English


![swimsuit edition [abbb] - 1.20 21 swimsuit edition - chapter](https://mymagazine.blog/wp-content/uploads/2025/09/swimsuit-edition-abbb-1.20-21-swimsuit-edition-chapter1-1024x574.webp)


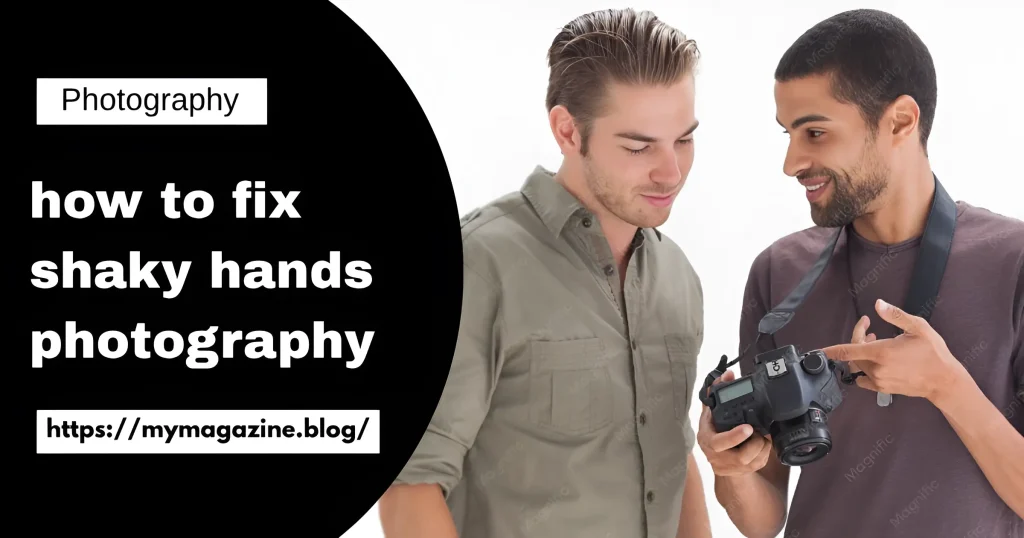
How to Fix Shaky Hands Photography: Powerful Tips
Every photographer from the hobbyist who just unboxed their first mirrorless camera to the seasoned professional shooting in low light has experienced the quiet frustration of pulling up a photo on screen only to discover it is slightly blurred. Not because the subject moved. Not because the focus missed. Because their hands were not perfectly still at the moment the shutter fired. Camera shake is one of the most common and most solvable problems in photography, yet it continues to cost photographers otherwise excellent shots every single day.
If you have been searching for reliable, practical answers on how to fix shaky hands photography, this guide is written specifically for you. What follows is not a list of generic tips recycled from manufacturer manuals. It is a comprehensive, experience-backed breakdown of why camera shake happens, what actually works to prevent and correct it, and how photographers at every level have transformed their keeper rate by addressing this one issue deliberately and systematically.
Understanding Why Shaky Hands Ruin Photos
Before jumping into solutions, it is worth spending a moment on the problem itself — because understanding why camera shake causes blur is what makes the solutions make intuitive sense rather than feeling like arbitrary rules to memorize.
When you press the shutter button, the camera sensor is exposed to light for a specific duration — the shutter speed. During that duration, if the camera moves even a tiny amount, the light from any given point in the scene traces a small path across the sensor instead of landing on a single point. The result is motion blur. And your hands are never perfectly still. Even when you are calm and focused, small involuntary muscle tremors, your heartbeat, and natural breathing all introduce movement into the camera.
The faster your shutter speed, the shorter the window during which that movement can cause problems. At 1/2000th of a second, even significant hand movement produces no visible blur. At 1/30th of a second, even minor tremors become clearly visible in the final image. This relationship between shutter speed and camera shake is central to everything that follows in this guide.
Focal length matters too. A wide-angle lens at 24mm is far more forgiving of hand movement than a telephoto lens at 300mm. The longer the lens, the more it magnifies not just the scene but any movement behind the camera. This is why telephoto sports and wildlife photographers are so deliberate about their shooting technique and support systems.
The Foundational Fix: Proper Handholding Technique
The single most impactful thing most photographers can do to fix shaky hands photography costs absolutely nothing and requires no equipment purchase. It is simply learning and consistently practicing correct handholding technique.
The way most people instinctively hold a camera is not optimally stable. Holding the camera body with both hands level in front of the face while standing upright with arms outstretched is essentially turning yourself into a vibrating platform. The arms have no bracing, the elbows are floating in space, and the body’s natural movements are transmitted directly and efficiently into the camera.
Here is what stable handholding actually looks like:
- Support the lens from below with your non-dominant hand — your left hand if you shoot right-handed. Cup the lens barrel, not grip it from the sides. Your palm faces up, creating a stable platform.
- Tuck your elbows into your body — pressed gently but firmly against your chest or ribs. This transforms your arms from unsupported levers into braced supports. The difference in stability is immediately noticeable.
- Use your eye to the viewfinder — pressing the camera firmly against your eye socket adds a third point of contact that significantly reduces camera movement. Photographers who shoot exclusively with the rear screen at arm’s length are giving up a substantial stability advantage.
- Manage your breathing — take a breath, exhale about halfway, then hold for the moment of the shot. Your body is most still in that brief pause between exhale and the next inhale. Firing on a full exhale works for some people; experiment to find what is most natural.
- Squeeze the shutter gently — do not jab at the shutter button. A sudden, forceful press introduces its own blur. A smooth, progressive squeeze that continues through the moment of exposure keeps the camera stable.
- Plant your feet shoulder-width apart — your stance is part of your camera support system. Feet together creates an unstable base. Shoulder-width stance with a slight knee bend gives your body a stable platform to operate from.
These habits feel slightly unnatural at first because they require conscious attention. But within a few sessions of deliberate practice, they become automatic. Photographers who commit to correct technique regularly find that their handheld keeper rate improves dramatically before they change a single camera setting.
The Reciprocal Rule and When to Break It
Photography has a simple traditional guideline for avoiding camera shake: keep your shutter speed at or above the reciprocal of your focal length. Shooting at 50mm? Use 1/50th of a second or faster. Shooting at 200mm? Use at least 1/200th of a second.
This rule exists because it reflects the real relationship between focal length, magnification, and the visibility of movement. It is a useful starting point, and for many years it was about as precise as practical field guidance could get.
However, modern photographers need to understand the rule more deeply to apply it well. First, crop sensor cameras magnify more than full-frame cameras because of their smaller sensor size. A 200mm lens on a crop sensor body behaves more like a 300mm or 320mm lens in terms of how much it magnifies camera shake. Applying the reciprocal rule on a crop sensor camera requires multiplying the focal length by the crop factor — typically 1.5x for APS-C sensors — before calculating the minimum shutter speed.
Second, individual physiological differences matter more than most photography guides acknowledge. Some photographers have naturally steadier hands. Others — whether due to fatigue, caffeine consumption, anxiety, medical conditions, or simply their natural physiology — experience more pronounced hand tremor. The reciprocal rule is an average, and averages do not apply equally to everyone.
If you have been wondering how to fix shaky hands photography specifically for your situation, the honest answer is to test your personal limits rather than assuming the standard rule applies to you perfectly. Shoot a series of frames at progressively slower shutter speeds and examine the results at 100% zoom on your computer screen. Find the shutter speed at which your images stop being sharp, add one or two stops of buffer above that, and use that as your personal minimum.
Image Stabilization: What It Does and What It Cannot Do
Image stabilization technology — whether built into the lens, the camera body, or both — is one of the most misunderstood features in modern photography. Understanding what it actually does, how effective it genuinely is, and where its limits lie will help you use it as one tool among several rather than a substitute for good technique.
Image stabilization works by detecting movement through gyroscopic sensors and compensating for that movement either by shifting optical elements within the lens (optical image stabilization, or OIS) or by physically shifting the camera sensor (in-body image stabilization, or IBIS). The result is that the image on the sensor stays more still even as the camera body moves, allowing sharp images at shutter speeds that would otherwise produce blur.
Modern stabilization systems are genuinely impressive. Many cameras and lens combinations advertise five, six, or even eight stops of stabilization — meaning a shot that would require 1/250th of a second to be sharp without stabilization might be sharp at 1/4 of a second with it engaged. In real-world shooting, results vary, but even conservatively, a quality stabilization system buys most photographers three to four reliable stops of slower shutter speed.
However, image stabilization has important limitations that photographers need to understand:
- It does not freeze subject motion — it only compensates for camera movement. If your subject is moving, stabilization does nothing to prevent motion blur from the subject itself. This is one of the most common misunderstandings about the technology.
- It has an effectiveness ceiling — at extremely slow shutter speeds, even the best stabilization system cannot compensate fully for the scale of movement involved. Stabilization helps you shoot at 1/4 second; it will not reliably help you shoot at 10 seconds handheld.
- It can interfere with certain techniques — panning shots, where you follow a moving subject to keep them sharp against a blurred background, can be disrupted by stabilization systems that do not include a panning mode. Most modern systems detect panning automatically or include a panning mode; use it.
- It consumes battery — this is a minor consideration but worth knowing. If you are shooting in extremely cold weather or an extended session, the additional power draw from a continuously active stabilization system is real.
Used correctly and with realistic expectations, image stabilization is a valuable tool in the arsenal of how to fix shaky hands photography. It is most valuable in low-light conditions where raising shutter speed would require pushing ISO to unacceptable noise levels, and when shooting at longer focal lengths where the multiplication effect of the telephoto magnification makes camera shake more problematic.
Physical Supports: Tripods, Monopods, and Environmental Bracing
When shutter speeds need to drop below what good technique and image stabilization can manage, or when maximum image sharpness is the priority regardless of shutter speed, physical support becomes the solution of choice.
Tripods
A tripod eliminates camera shake entirely when used correctly. The camera becomes a fixed point in space, completely decoupled from any tremor in the photographer’s hands or body. This is why tripods are non-negotiable for landscape photographers capturing long exposures at dawn, architectural photographers who need edge-to-edge sharpness across a wide shot, and product photographers working in controlled studio environments.
The important qualifier is “used correctly.” A poorly set-up tripod can actually introduce vibration rather than eliminate it. The most common mistakes include:
- Extending the thinner, lower leg sections before the thicker upper sections — this reduces rigidity
- Failing to spread the legs wide enough — a narrow-stance tripod is easy to knock and creates a higher center of gravity
- Using the center column fully extended — the center column is the least stable part of most tripods; avoid it or use it minimally
- Not using a remote shutter release — pressing the shutter button on a tripod-mounted camera still introduces vibration through your hand. A cable release, wireless remote, or the camera’s built-in self-timer mode eliminates this
- Ignoring mirror lock-up on DSLR cameras — the physical movement of the mirror flipping up inside a DSLR creates a small vibration at the moment of exposure. At shutter speeds between about 1/30th and 1/2 second, this mirror slap is actually visible in images. Mirror lock-up fires the mirror first, waits for vibrations to settle, then opens the shutter
Monopods
A monopod is a single-legged support that provides significant stability improvement over handheld shooting while remaining far more portable and quick to use than a tripod. Sports photographers working on the sidelines, wildlife photographers moving through terrain, and event photographers who need to move frequently while shooting in challenging light rely heavily on monopods.
A monopod does not eliminate camera shake entirely — the single leg must still be held steady and does not prevent side-to-side movement. But it dramatically reduces the fatigue-related shake that comes from holding a heavy telephoto lens up for hours, and it provides a physical anchor that cuts down vertical movement substantially.
Environmental Bracing
Many photographers overlook the simplest support available: the environment itself. Leaning against a wall, resting the lens on a fence post or car roof, sitting with elbows braced on knees — these improvised supports can make the difference between a blurry shot and a sharp one in situations where a tripod is neither available nor appropriate.
Professionals working in news environments or documentary contexts have used environmental bracing for decades. Knowing how to quickly identify and use whatever solid surface is nearby is a genuinely useful skill, and one that requires nothing more than awareness and practice.
The Role of ISO in Fixing Camera Shake
Raising ISO is directly relevant to solving camera shake problems because it allows the camera to use faster shutter speeds in dim conditions without requiring a physical support or compromising depth of field.
When light levels drop, photographers face a choice: slow down the shutter speed to let in more light (risking camera shake), open the aperture wider (changing depth of field), or raise the ISO (increasing sensor sensitivity at the cost of increased digital noise). For photographers who need to fix shaky hands photography in low-light conditions, raising ISO is often the most practical solution.
Modern camera sensors handle high ISO extraordinarily well compared to cameras from even a decade ago. What was grainy and unacceptable at ISO 3200 on cameras from the early 2010s is clean and publishable at ISO 6400 or even ISO 12800 on contemporary full-frame sensors. The fear of high ISO that many photographers carry from earlier experience with digital cameras often leads them to accept motion blur that is far more damaging to image quality than modern digital noise would be.
The practical guidance here is straightforward: if you are choosing between a slightly noisy sharp image and a clean blurry image, the noisy sharp image is almost always preferable. Noise can be reduced in post-processing. Motion blur from camera shake cannot be fixed in post with any reliability.
Post-Processing Options for Existing Blurry Photos
Despite everything covered so far, you will occasionally — perhaps frequently while learning — end up with images that are sharper than average, but not quite tack-sharp. For images where the blur is slight, post-processing sharpening tools can recover usable results.
Most professional photo editing applications include some form of deblur or sharpening functionality. The key distinction to understand is the difference between sharpness and sharpening. True sharpness is captured in-camera; no software can create detail that was not recorded. What sharpening tools do is increase the contrast between adjacent pixels at edges, which creates the visual perception of sharper detail. For images with slight blur, this can produce genuinely improved results. For images with significant motion blur, sharpening typically makes the problem more obvious rather than less.
AI-powered sharpening tools have advanced dramatically in recent years. Several software tools now use machine learning models trained on millions of sharp and blurry image pairs to reconstruct likely sharp detail from blurred images. The results are not perfect, but they are genuinely impressive for images with moderate camera shake blur. For images that are otherwise excellent but slightly soft — a great expression, a decisive moment, perfect composition — these tools are worth exploring before discarding the shot entirely.
It is important to keep post-processing in perspective, however. Fixing blur in post is a rescue operation, not a strategy. The goal is to minimize blur in the first place, and to treat post-processing sharpening as an occasional safety net rather than a substitute for correct shooting practice.
Case Study: Street Photographer Transforms Keeper Rate
Consider the experience of a street photographer who had been shooting for three years and was deeply frustrated with the number of images she had to discard from each session. Shooting in city environments — often in shade, under awnings, inside markets — she was consistently fighting low light. Her instinct was to keep ISO as low as possible, which meant slow shutter speeds, which meant camera shake blur on the majority of her shots.
The shift in her approach came from two changes applied simultaneously. First, she committed to shooting at 1/250th of a second as her floor regardless of light conditions, raising ISO as high as needed to maintain that speed. Second, she practiced proper handholding technique — specifically the elbow-tuck and the viewfinder contact habit — for two consecutive weeks. She also started using environmental bracing instinctively: leaning against walls, using window ledges, squatting with elbows on knees.
The result was striking. Her keeper rate — defined as technically sharp images she would consider showing or selling — went from roughly 30% to over 70% in the space of a month. None of this required new equipment. It required understanding the problem, committing to specific behavioral changes, and practicing those changes consistently enough that they became default habits.
This story is not unusual. It reflects what most experienced photographers discover when they address camera shake methodically: the solutions work, but they require genuine commitment to change ingrained habits.
Case Study: Wildlife Photographer Solves Telephoto Shake
A wildlife photographer shooting birds in flight with a 500mm telephoto lens faced a different set of challenges. At that focal length, the reciprocal rule demands a shutter speed of at least 1/500th of a second — and for birds in flight where the subject is also moving, 1/1000th or 1/2000th is more appropriate. In the early morning and late afternoon light that produces the best photographic opportunities for wildlife, hitting those shutter speeds requires either a very wide aperture, very high ISO, or both.
His approach combined three elements. He invested in a monopod, which allowed him to manage the weight of the heavy lens across long sessions without fatigue-induced shake. He adjusted his exposure approach to prioritize shutter speed, accepting ISO values up to 12800 on his modern full-frame body because he had tested and confirmed that the resulting images met his quality standards. And he learned to use his camera’s image stabilization system correctly, switching it to the mode designed for panning when tracking moving subjects.
The combination produced reliably sharp images in conditions that had previously frustrated him. The key insight from his experience is that solving how to fix shaky hands photography at telephoto focal lengths is a systems problem — no single change is sufficient, but combining good technique, appropriate support, sensible exposure settings, and proper use of stabilization technology produces results that each element alone cannot.
Special Considerations for Photographers With Medical Tremor
For photographers who experience hand tremor due to medical conditions — essential tremor, Parkinson’s disease, medication side effects, or other causes — the challenge of camera shake is more pronounced and requires some additional consideration.
Standard advice about good technique still applies and still helps. But photographers managing more significant tremor benefit from additional strategies:
- Heavier cameras and lenses actually help — the physics of tremor mean that heavier objects are less easily deflected by small muscle movements. A heavier camera body or the use of an accessory grip to add mass can reduce the amplitude of shake-induced movement.
- Electronic shutter modes eliminate mirror vibration and reduce the mechanical shock of the shutter mechanism itself, removing one source of image-degrading movement.
- Viewfinder bracing is especially important — the three-point contact of camera-to-eye provides meaningful stabilization benefit that is amplified when dealing with more pronounced tremor.
- In-body image stabilization (IBIS) is more valuable for photographers with tremor, and choosing a camera system with strong IBIS implementation deserves prioritization in purchasing decisions.
- Shooting in burst mode and selecting the sharpest frame from a sequence is a practical strategy. Multiple frames increase the probability that one was captured during a moment of relative stillness.
Photography is an adaptive pursuit. Photographers managing physical challenges that affect camera stability have successfully produced beautiful, technically excellent work by combining the strategies above with the same patience and deliberate practice that benefits all photographers.
Building Long-Term Habits: The Practice Approach
Reading about how to fix shaky hands photography is the first step. The second, more important step is building the habits that prevent the problem from occurring in the first place. Habits are not built by reading; they are built by deliberate, repeated practice.
The most effective approach is to designate a specific block of practice time — even thirty minutes per session, two or three times per week — where the explicit goal is practicing technique rather than capturing images. Set up a target (a newspaper page on a wall, a detailed object on a table), set your shutter speed to a deliberately challenging value, and shoot in volume while focusing entirely on your form. Review the results not for the quality of the subject matter but for technical sharpness, and trace any blur back to the specific element of technique that needs attention.
This kind of deliberate, feedback-driven practice compresses the learning curve dramatically. Photographers who practice this way for a month typically develop the stable handholding habits that casual shooters accumulate over years of incidental experience.
Gear Recommendations That Make a Real Difference
While technique and habit are the foundation, certain equipment choices do make a meaningful difference in how manageable camera shake is:
- A camera body with strong IBIS — in-body image stabilization that works across all lenses, including manual and vintage glass, is one of the most broadly useful stabilization solutions available
- Lenses with optical stabilization — for telephoto shooting especially, lens-based stabilization tuned to that specific focal length and optical design often outperforms body-based stabilization alone; many systems combine both for maximum effect
- A quality travel tripod — carbon fiber tripods provide rigidity without weight, making photographers more likely to actually carry and use one
- A remote shutter release — inexpensive, compact, and immediately effective at eliminating the shutter-press vibration that undermines tripod work
- A well-fitted camera strap — a shoulder strap kept taut against the neck adds a bracing element when shooting handheld; a wrist strap keeps the camera secure and slightly tensioned during handheld shooting
None of these items are magic solutions, and none of them substitute for good technique. But for photographers who have their technique solid and want to maximize their system’s performance, these tools provide genuine, measurable benefit.
Frequently Asked Questions (FAQ)
Why are my photos blurry even when my shutter speed seems fast enough?
Several factors beyond shutter speed can cause blur. Camera shake is one cause, but subject movement is another — a shutter speed that freezes camera shake may still be too slow to freeze a moving subject. Also consider whether your autofocus system is actually confirming focus accurately; a front or back focus error from the lens produces a kind of soft blur that can be mistaken for motion blur. Finally, check your image at 100% zoom — photos can appear sharp at small sizes but show significant blur when examined at pixel level.
Does image stabilization work for video as well as photos?
Yes, image stabilization is extremely valuable for video, where even subtle camera movement creates distracting footage. Many cameras offer enhanced stabilization modes specifically for video that provide smoother, more cinematic results. For serious video work, a gimbal — a motorized stabilizer — goes further than lens or sensor stabilization alone, eliminating virtually all camera movement for professional-quality smooth footage.
How much does a good tripod need to cost to be effective?
You do not need to spend hundreds of dollars on a tripod to get genuine stability. A well-built mid-range tripod in the $100–$200 range provides excellent rigidity for most photography. The diminishing returns above that price point relate to weight savings through carbon fiber construction and more refined ball head mechanisms rather than fundamental stability. What matters most is that the tripod you buy is one you will actually use — a lightweight, portable mid-range tripod brought to every shoot is far more valuable than a professional-grade tripod left at home because it is too heavy to carry.
Can I fix camera shake blur in Lightroom or Photoshop?
You can improve slightly blurry images using sharpening tools, and AI-powered deblur tools in recent software versions can recover usable results from moderately blurry images. However, significant camera shake blur cannot be fully corrected in post-processing. Software sharpening increases edge contrast and creates the perception of sharpness but cannot reconstruct detail that was not recorded. Always treat in-camera technique as the primary solution and post-processing as an occasional rescue tool.
Is image stabilization more important than a faster lens for low-light photography?
Both matter, but they solve different parts of the problem. A faster lens (wider maximum aperture) lets in more light, allowing faster shutter speeds at any given ISO. Image stabilization lets you use slower shutter speeds without camera shake blur. For stationary subjects in low light, stabilization is extremely valuable because slow shutter speeds are feasible. For moving subjects in low light, a faster lens is often more important because you need fast shutter speeds regardless of stabilization. Ideally, you want both.
Why do my handheld photos look sharp on the camera screen but blurry on my computer?
The camera’s rear LCD screen is small enough that moderate blur is not visible — the image looks sharp at that display size. Viewing the same image at 100% on a computer monitor reveals the actual pixel-level sharpness. This is why it is essential to zoom in when reviewing images on your camera, or better yet, review your critical shots on a computer before concluding that your shooting session produced sharp results.
How does shooting in burst mode help with camera shake?
When you fire a burst of three, five, or more frames, you are sampling multiple moments in quick succession. The camera’s position and your hand’s tremor cycle through a range of positions during those frames. Some frames will be captured at a more stable moment than others. Reviewing the burst and selecting the sharpest frame significantly improves your success rate, particularly at shutter speeds near your personal camera shake threshold. This is a practical strategy used by professional photographers regularly, not a crutch for beginners.
Does hand tremor get worse when you are nervous or tired?
Absolutely, and this is something every photographer should be aware of. Fatigue, anxiety, caffeine, cold temperatures, hunger, and stress all increase involuntary hand tremor. The shutter speed that works reliably when you are calm and rested may be insufficient when you are tired after a long shoot, anxious before an important event, or cold from standing in winter weather. Building additional margin into your shutter speed in high-pressure or fatiguing situations is a practical response to this physiological reality.
Conclusion
Camera shake is one of the most universal challenges in photography, and it is also one of the most solvable. The range of solutions from proper handholding technique to image stabilization technology to physical supports to intelligent exposure management gives photographers at every level and every budget real, practical tools to address the problem.
What separates photographers who consistently produce sharp images from those who struggle with blur is rarely equipment. It is the combination of understanding the problem clearly, applying the right solutions for the specific context, and practicing the habits that make correct technique automatic rather than effortful.
The journey of learning how to fix shaky hands photography is, in a sense, the journey of becoming a more deliberate, more skilled photographer in general. The attention you bring to understanding camera shake — the physics of it, the techniques that address it, the way different shooting situations require different approaches — builds the kind of photographic intelligence that improves every dimension of your work.
Start with technique. Master your handholding form. Understand your personal shutter speed limits through testing rather than assumption. Use image stabilization intelligently and with realistic expectations. Reach for physical supports when conditions demand them. And when you do end up with a slightly soft shot despite everything, treat it as information — a data point that tells you something about which element of your system needs attention.
Sharp images are not the result of luck. They are the result of knowledge applied consistently, and that is something every photographer can develop.
For More Visits: Mymagazine