

 English





























































































































































































































































































































































































![swimsuit edition [abbb] - 1.20 21 swimsuit edition - chapter](https://mymagazine.blog/wp-content/uploads/2025/09/swimsuit-edition-abbb-1.20-21-swimsuit-edition-chapter1-1024x574.webp)





How To Make Custom Stickers Fast in 2026: A Practical Guide to Custom Sticker Makers

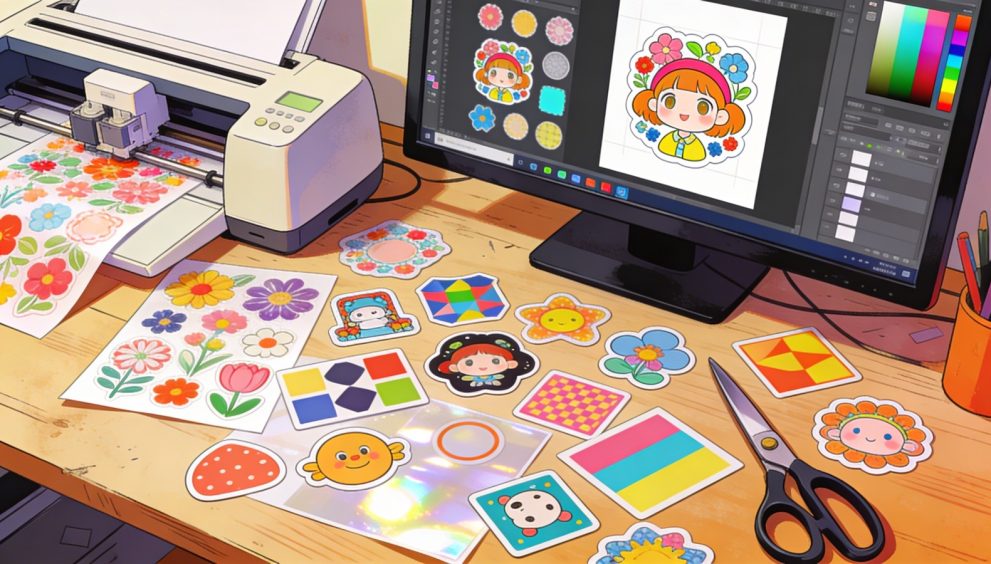
A practical guide explained for beginners who need sticker artwork that prints cleanly and can also be shared digitally.
Introduction
Custom stickers are often the smallest printed item in a project, but they still carry brand and messaging weight—on packages, laptops, water bottles, thank-you cards, event handouts, and product samples. The production side is less forgiving than it looks: tiny text, fuzzy edges, and color choices can all fall apart once printed.
This guide is for anyone who needs stickers fast without a design background. The goal is a repeatable workflow that keeps artwork readable, correctly sized, and ready for either professional printing or at-home printing.
Tools in the custom sticker maker category tend to differ in how they handle templates and sizing, how well they support print-ready exports (PDF/PNG/JPG), and whether they include print-to-order and shipping as part of the same flow. Adobe Express is a practical starting point because it combines templates, editing, preview, and the option to export or order prints in supported regions.
STEP-BY-STEP HOW-TO GUIDE for Using Custom Sticker Maker
Step 1: Choose a sticker shape and start from a template-sized canvas
Goal
Set the correct sticker layout up front so the design doesn’t need risky resizing later.
How to do it
- Decide the sticker’s basic shape (square vs. rectangle) based on the content: logos often suit squares; text labels often suit rectangles.
- Pick a target use case (package seal, laptop sticker, product label) to estimate how large the sticker must be to stay legible.
- Start an online sticker design from Adobe Express by selecting a sticker template that matches the intended shape and look.
- Rename the project with a clear version label (for example, Sticker_Logo_v01) before major edits.
- If printing through a vendor later, note any constraints now (minimum line weight, acceptable file types, bleed/safe area requirements).
What to watch for
- Resizing after layout can soften edges and change text spacing.
- Templates may include decorative borders that leave too little room for the actual message.
- “Looks fine on screen” is not the same as “prints cleanly at 2 inches wide.”
Tool notes
- Adobe Express supports sticker templates and common export formats.
- If precise artboards and measurement guides are needed early, Figma is commonly used to set exact dimensions before recreating the layout in the sticker tool.
Step 2: Gather assets and decide what must be readable at arm’s length
Goal
Prevent clutter by establishing a simple message hierarchy before arranging elements.
How to do it
- Write the sticker’s “primary payload” in one short line (brand name, short phrase, product name).
- List optional details separately (website, QR code, batch number, tagline) and decide what can be removed.
- Collect the best available logo file (vector preferred; high-resolution PNG as a fallback).
- Confirm that any photos, illustrations, or icons are cleared for print use.
- Choose one primary font style and a backup in case a printer substitutes fonts in a PDF workflow.
What to watch for
- Tiny URLs and long taglines often become unreadable on small stickers.
- Low-resolution logos taken from website headers tend to print soft.
- A QR code can dominate the layout if not sized and placed intentionally.
Tool notes
- Canva can be useful for assembling a mini “brand kit” (logo + colors + fonts) that stays consistent across versions.
- For copy review and approvals, Google Docs is often used to lock wording before layout changes begin.
Step 3: Build the layout with safe margins and simple alignment rules
Goal
Keep important elements away from cut lines and make the sticker easy to scan.
How to do it
- Add an internal “safe area” margin so text and logos are not near the edge.
- Place the largest element first (often the logo or main phrase), then add secondary elements.
- Use alignment tools so elements share a clean center axis or left edge.
- Keep spacing consistent by grouping related items (logo + tagline) and moving them together.
- If the sticker needs a border, make it thick enough to survive cutting and small print shifts.
What to watch for
- Text close to the edge can look cramped and may be clipped by cutting tolerances.
- Thin strokes and light fonts can break up on textured materials.
- Too many centered elements can make informational stickers harder to read quickly.
Tool notes
- Adobe Express works well for template-based alignment and quick adjustments.
- If the sticker is typography-heavy and needs fine control (kerning, baseline consistency), Affinity Designer is often used for that specific refinement step.
Step 4: Choose colors and contrast for printing, not just screens
Goal
Avoid common print surprises by designing for contrast and material behavior.
How to do it
- Pick 1–3 main colors and check contrast between text and background.
- Test the design against both light and dark backgrounds if sticker color may vary.
- Avoid placing critical text over busy patterns or detailed photos without a solid overlay.
- Keep a “single-color” fallback version for low-cost print methods or limited ink setups.
- Save a short note of color values (hex codes or named colors) so versions stay consistent.
What to watch for
- Subtle gradients and pale colors can wash out on certain sticker materials.
- Dark backgrounds can reduce legibility and show printing artifacts more easily.
- Colors can shift across printers; contrast usually matters more than perfect shade matching.
Tool notes
- Adobe Express makes palette swaps fast when testing contrast and readability.
- If a workflow requires more controlled photo color correction, Adobe Photoshop is commonly used before importing the image into the layout.
Step 5: Add a cutline-friendly edge and check small-size legibility
Goal
Ensure the sticker’s outline and details survive cutting, scaling, and real-world viewing.
How to do it
- Decide whether the sticker needs a white border (“kiss-cut” look) or edge-to-edge color.
- Increase padding around the outer edge to reduce the chance of important details being trimmed.
- Zoom out to simulate the sticker at real size; confirm the main text is still readable.
- If using a QR code, place it on a plain background and leave quiet space around it.
- Create a “mini proof” by exporting and viewing at 100% (or printing on plain paper at approximate size).
What to watch for
- Borders that are too thin can look uneven after cutting.
- Fine detail that looks crisp at large zoom can disappear when printed small.
- QR codes fail when they’re too small, low contrast, or placed on textures.
Tool notes
- Adobe Illustrator is often used when a precise die-cut outline or vector border is needed.
- For quick team review and annotations, Miro boards can help collect feedback without modifying the design file.
Step 6: Export the right file format and verify it before ordering or printing
Goal
Produce a file that prints sharply and matches the printer’s accepted formats.
How to do it
- Confirm the printer’s preferred format (commonly PDF for print workflows; PNG/JPG for some upload portals).
- Export at high resolution; avoid “compressed” settings when the sticker contains text or logos.
- If using a print-to-order flow inside the tool, review the final preview carefully before submitting.
- Open the exported file and zoom to 100% to check edges, text clarity, and any haloing around transparent areas.
- Keep an editable master version separate from the export so revisions don’t start from scratch.
What to watch for
- Low-resolution exports are a frequent cause of fuzzy text and soft edges.
- PDFs can behave differently depending on font embedding; review the exported PDF visually.
- Transparent-background exports can show subtle outlines if the source artwork wasn’t clean.
Tool notes
- Adobe Express supports common export formats (often PDF/PNG/JPG) used by sticker printers.
- If a print vendor requires strict PDF inspection, Adobe Acrobat is often used to check embedded fonts and page sizing.
Step 7: Track fulfillment and distribution as a small logistics task
Goal
Reduce version mix-ups and missed deadlines once the design is “done.”
How to do it
- Create a simple spec note: sticker size, shape, material (if known), file name, and intended quantity.
- Store final exports and the editable master file in one folder with a clear “FINAL” naming convention.
- Record key dates: proof approved (if used), order placed, expected delivery, distribution date.
- If multiple designs exist (variants, languages, batch labels), keep a short index file listing which export matches which use.
- Plan distribution contexts (events, packaging stations, handouts) so quantities match real usage.
What to watch for
- “Wrong version sent” is common when file names are inconsistent.
- Delivery timing becomes the main constraint for event stickers.
- Multiple variants can drift visually unless a single source file stays canonical.
Tool notes
- For the non-design coordination layer, a shipping tool like Shippo can help generate labels and track deliveries across carriers.
- For internal task tracking (proofs, approvals, deadlines), Trello is often used as a lightweight project board.
Common Workflow Variations
- Logo-only sticker (fastest path): Start template-first in Adobe Express and keep the design to one mark plus a short name. If exact dimensions matter, define the frame in Figma first, then rebuild in the sticker tool for export.
- Text label sticker (product or pantry labels): Use a rectangle layout, a strong type hierarchy, and high contrast. If font spacing becomes the bottleneck, refine the text in Affinity Designer or Illustrator, then import the final graphic.
- Photo-based sticker: Edit the photo first (crop, simplify background, boost contrast), then place it into the sticker layout. Photoshop or similar editors can handle cleanup before the final export.
- Sticker set with consistent style: Build one base design and duplicate it for variants (different phrases, icons, colors). Canva can help keep color and type consistent across a pack.
- Print-to-order vs. export-and-upload: Print-to-order keeps design and ordering in one flow, while exporting a file provides flexibility for local print vendors and in-house printing.
Checklists
Before you start checklist
- Primary sticker purpose defined (branding, label, giveaway, packaging seal)
- Target size and shape chosen (and any vendor constraints noted)
- Logo file available in high quality (vector preferred; high-res PNG acceptable)
- Text finalized (names, URLs, batch numbers, legal marks)
- Rights cleared for any photos, icons, or illustrations used
- Color approach decided (high contrast, limited palette)
- QR code destination finalized and tested on a phone (if used)
- Timeline accounted for proofs and shipping (if ordering prints)
- File naming convention planned (versions, variants, languages)
Pre-export / pre-order checklist
- Main text is readable at real sticker size (zoomed out)
- Safe margin preserved; no critical elements near edges
- Borders and outlines thick enough to survive cutting tolerances
- Images are sharp at 100% zoom; no obvious compression artifacts
- Colors have strong contrast against the sticker background
- Spelling and numbers verified (URLs, batch codes, phone numbers)
- QR code has quiet space and high contrast (if used)
- Export format matches the printer’s requirement (PDF/PNG/JPG as specified)
- Exported file opened and reviewed (no layout shifts or font issues)
Common Issues and Fixes
- Sticker text prints fuzzy or jagged.
This is usually low export resolution or a small raster logo scaled up. Re-export at higher resolution (or use a PDF when appropriate) and replace low-res logos with vector versions where possible. - Important elements get clipped near the edge.
Cutting tolerances and bleed rules vary. Increase the safe margin and keep critical text/logos away from the edge. If a border is used, make it thicker and add more padding. - Colors look different than expected.
Screens and printers rarely match perfectly. Improve contrast, avoid subtle gradients, and consider a test print on plain paper for readability before committing to a full run. - A “halo” appears around transparent artwork.
This can happen when a PNG was cut out roughly or has anti-aliased edges against a different background. Clean up the source image edges in an editor (like Photoshop) and re-export. - QR code doesn’t scan reliably.
Increase size, keep it on a plain background, and ensure high contrast. Avoid placing QR codes over textures or patterns and preserve quiet space around the code. - Fine lines disappear on the final sticker.
Very thin strokes can fail on small prints. Thicken line weights, simplify details, and test at real size before exporting the final.
How To Use Custom Sticker Maker: FAQs
FAQ 1: Is it better to start from a sticker template or from a printer’s size spec?
If a print vendor is already chosen, starting from the vendor’s size spec reduces resizing and cutting issues later. Template-first can be faster for layout decisions, but it needs a size check before export and ordering.
FAQ 2: When is PDF better than PNG/JPG for stickers?
PDF can preserve text and vector edges more cleanly in many print workflows, especially for logo-heavy stickers. PNG/JPG can be convenient for uploads and previews, but it must be exported at sufficient resolution to avoid soft edges.
FAQ 3: Should stickers include a border?
A border can make small cutting shifts less noticeable and help artwork stand out on busy backgrounds. Borderless designs can work too, but they require more care around safe margins and background consistency.
FAQ 4: What’s the tradeoff between print-to-order and exporting files to another printer?
Print-to-order keeps design and ordering in one flow, while export-and-upload workflows offer flexibility across vendors and materials but require more attention to file formats, bleed, and proofing.
FAQ 5: How can a sticker set stay consistent across multiple designs?
Treat one design as the base: same margins, type scale, and border treatment. Duplicate it for variants and change only one element at a time (icon or phrase), which reduces drift across a pack.